
Ikea-Inspired Veggie Balls
 Hi fellow foodies! It’s been a super busy Easter Holidays for me, filled with local days out and visiting family and friends. This is the first day in the last two weeks where I’ve had a moment to myself to sit down and think about writing up a recipe. I have also been looking forlornly at the empty pages of the site, such a Create Your Haven, and Tutorials and Videos and thinking how much I still have to work on to get this site completed. C’est la vie, as I constantly remind myself. Life has certainly still been full of food for me, and I continue to cook as I always do, it’s just that the documentation thereof hasn’t been taking place.
Today I’m going to share a recipe I created quite some months ago, which was inspired by a visit to everyone’s favourite store for… everything: Ikea. I had popped there one morning with littlest boy and my mum and sister. “Popped” is probably a slight understatement, since, as I now sit here recalling said visit, I seem to remember it commencing with a coffee, followed by a leisurely walk around the room layouts, followed by lunch. “Paid an extended visit” is probably more appropriate! On this occasion I chose the veggie balls for lunch. Now I will freely admit that I cannot usually resist a plate of Ikea meatballs with chips, gravy and lingonberry jam, so this was a foray from the norm for me in terms of choice of Ikea meal. I can happily inform you however, that the veggie balls turned out to be a great choice, to such an extent that I was inspired to create my own version, served with a slightly different sauce and accompaniment, which I have now made a couple of times and has gone down extremely well in our house. It’s a great recipe because all the veggies can be hidden in the ball, and you can mix and match or swap out the veggies I’ve used for whatever you fancy, particularly the root veg. So here it is, my recipe for Ikea-Inspired Veggie Balls; I hope you enjoy them too.
Ingredients
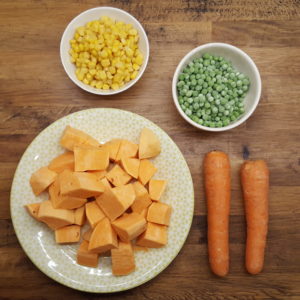
- 1 sweet potato, peeled and chopped
- 2 carrots, peeled and chopped
- 100g frozen peas
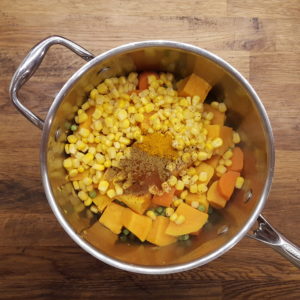
- Small tin sweetcorn
- 1/2 tsp turmeric
- 3/4 tsp cumin
- Pinch of curry powder
- Salt and pepper
- Lug of olive oil
For the sauce
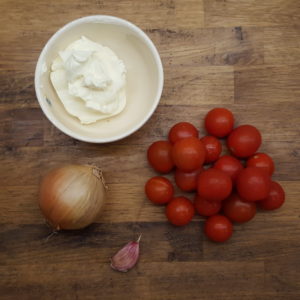
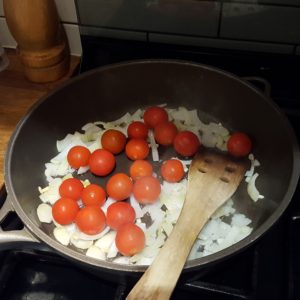
- Punnet of cherry tomatoes
- 1 onion
- Garlic clove
- 100g cream cheese
- Olive oil
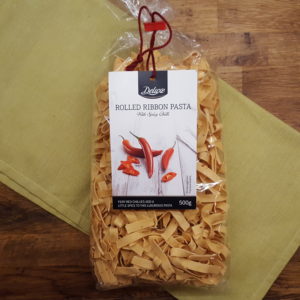
150g ribbon pasta to serve
Equipment
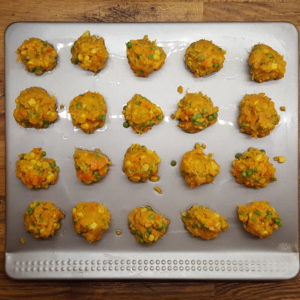
- Large baking sheet
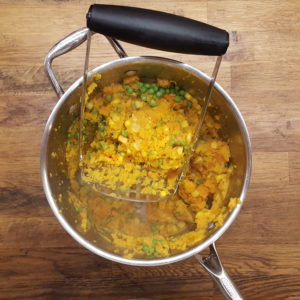
- Potato masher
Method
Place the sweet potato and carrot in a saucepan, bring to the boil, then simmer for approximately 8 minutes until a knife goes through with a tiny bit of resistance. Add the peas to the pan, return to the boil then simmer for a further minute or two, then drain. At this point, pre-heat the oven to fan 190⁰C.
Add the sweetcorn to the pan along with the spices and salt and pepper, then roughly mash. Lightly oil a baking sheet, then, using a dessert spoon and your hands, shape 20 balls, placing them on the sheet as you go. Drizzle a little oil over the balls, then bake in the pre-heated oven for 20-25 minutes.
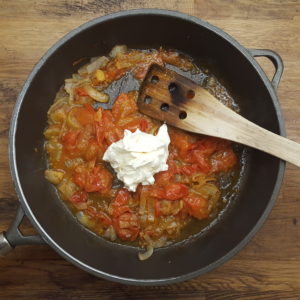
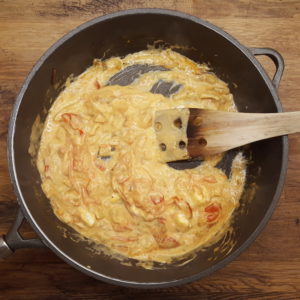
Now place a large, heavy-based saucepan on the hob with a lug of olive oil and set on a medium heat. Chop the onion and garlic and place in the pan. Soften on a medium heat for about 5 minutes then add the tomatoes and season. Place the lid on the pan allowing the tomatoes to break down in the steam, but stir frequently to allow the sauce to develop. At this stage, put the ribbon pasta on to cook according to packet instructions. Once the tomatoes have broken down to create a lovely sauce, add the cream cheese and stir well to combine it with the tomatoes, then heat through.
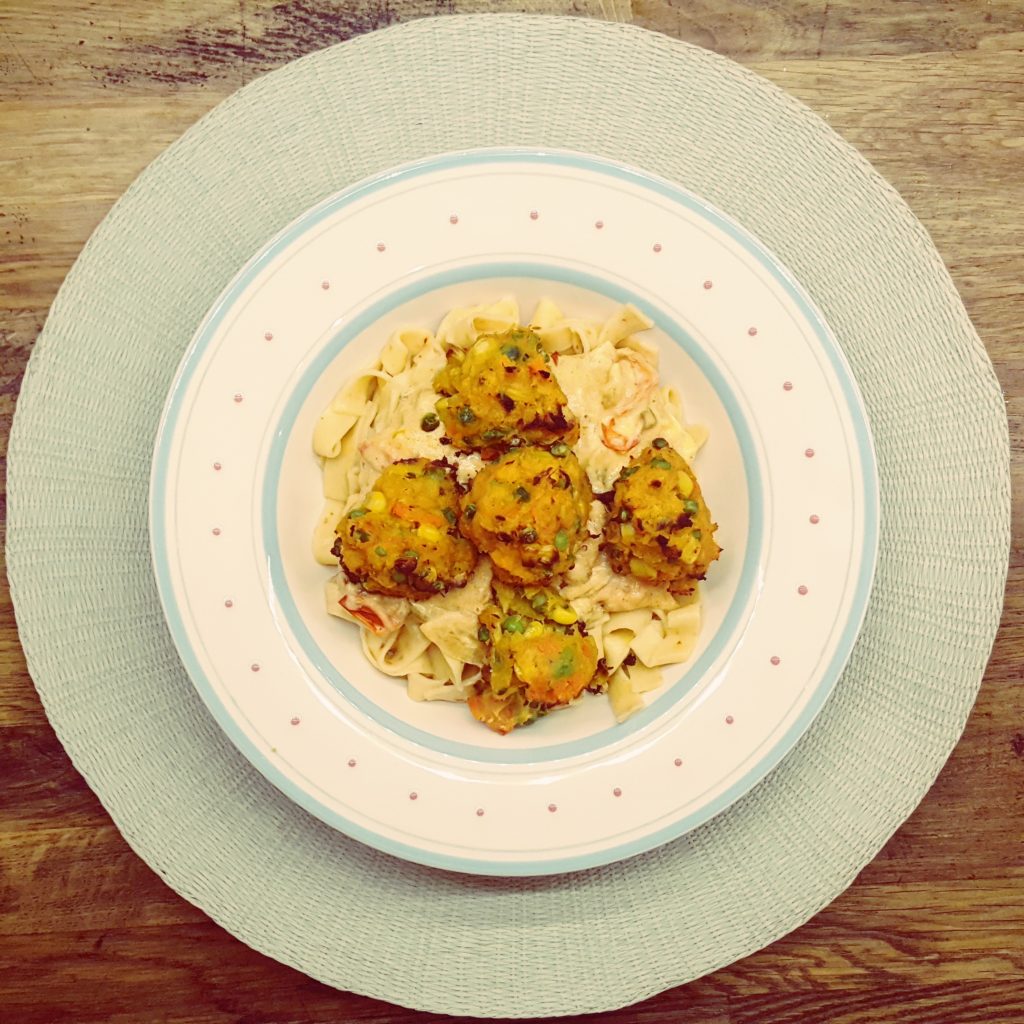
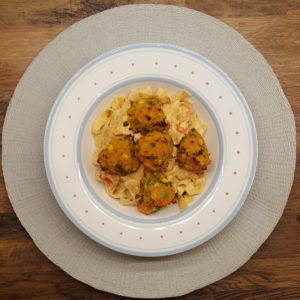
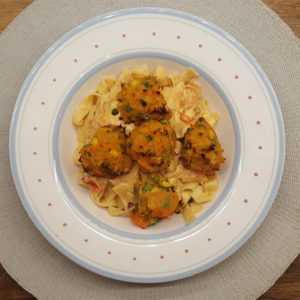
Serve the veggie balls on the ribbon pasta with a lovely dollop of the creamy tomato sauce on top.
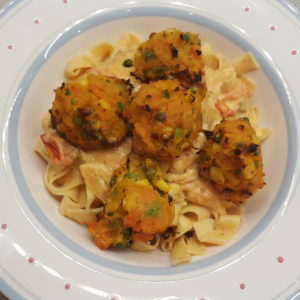
I recently published a recipe where I said that the photos may look rather unexciting but the actual food is far from it. I think this is another such meal. The tastes and flavours all combine so beautifully to create a really yummy mid-week meal for the whole family. Let me know how yours goes!
Thank you for reading 🙂
Sam
No Comments